Create your own magnets
There are almost no limits to your creative ideas for decorative magnets
Online since: 27/11/2008,
Number of visits: 821229
1
Even though supermagnete.hu does offer a nice selection of decorative magnets,
do you still want to make your own; either for yourself or as a special gift for your friends? Here are some ideas I came up with over time.
You can use them to create variety and colour on your magnetic board.
On a technical note:
- I used UHU MAX REPAIR adhesive.
- It is best to slightly roughen the objects with sandpaper or on a grinding disc. This makes it easier to glue them onto the magnets.
- Let the glue dry well before you put the magnets on the board!
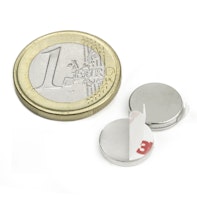
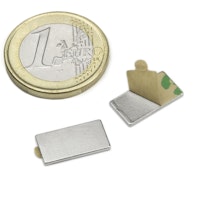
I used disc magnets 15 x 3 mm for most of my DIY magnets. With almost 3 kg adhesive force, they can hold a lot of paper, but you can still pull them off the board without having to resort to bodybuilding supplements. For light-weight objects, disc magnets 10 x 2 mm or disc magnets 12 x 2 mm work well. Cube magnets with an edge length of 5 mm or slightly smaller but thicker disc magnets are suitable for small, flat items. And for objects with a very smooth back, self-adhesive magnets may be used as well.
Tip: Measure the surface area of your objects before ordering the magnets so that they are not too big and visible once your finished decorative magnets hang on the magnetic board.
-


5 pcs. 0,83 EUR ea.*
Disc magnet Ø 15 mm, height 3 mm, holds approx. 3,2 kg -


10 pcs. 0,49 EUR ea.*
Disc magnet Ø 10 mm, height 2 mm, holds approx. 1,3 kg -


10 pcs. 0,46 EUR ea.*
Cube magnet 5 mm, holds approx. 1,1 kg -

20 pcs. 0,52 EUR ea.*
Disc magnet self-adhesive Ø 12 mm, height 2 mm, holds approx. 1,3 kg -


10 pcs. 0,42 EUR ea.*
Disc magnet Ø 8 mm, height 2 mm, holds approx. 1,1 kg -


1 pc. 7,95 EUR ea.(397,50EUR/kg)*
UHU MAX REPAIR
Ideas for items that can be turned into magnets
Coins from bygone times or far away countries: These too can have a purpose again, thanks to magnets.
To be able to get a better grip on them, I glued a thick washer between the disc magnet and the coin.
It would also be possible to use a slightly smaller but thicker disc magnet.
Almost every new garment with buttons purchased these days comes with an extra replacement button.
Instead of letting these buttons gather dust in a drawer, you can easily create stylish magnets with them.
Another great option: Keep one button of a beloved piece of clothing as a memento and to start a new life as a magnet on the magnetic board. This makes it easier to let go of a garment that is no longer worn and, at the same time, hang on to the memory.
Another great option: Keep one button of a beloved piece of clothing as a memento and to start a new life as a magnet on the magnetic board. This makes it easier to let go of a garment that is no longer worn and, at the same time, hang on to the memory.
Deco confetti left over from the wedding or another occasion? Fantastic, because it is perfect for making small decorative magnets.
They are not only pretty but also a great way to remember those wonderful days! To be able to better grip and remove the magnets from the magnetic board, we recommend using slightly smaller but thicker Disc magnets neodymium.
Arts and crafts tip
Pictures and drawings on paper or cardboard are great for attaching to self-adhesive magnets. The same goes for lightweight objects such as buttons, bottle caps, origami animals etc. Make sure to press the chosen object firmly onto the adhesive side of the magnet. Let the adhesive dry and your homemade magnets will be ready for their first use. We recommend a drying time of 72 hours.Please note: A magnet has only about 15% of its full force available when attached to vertical surfaces such as refrigerators or magnetic boards.
This is commonly known as holding strength.
It is best if you keep this in mind before you start your craft project to avoid any disappointment afterwards.
You can find more information on our FAQ page about holding strength.
-


20 pcs. 0,33 EUR ea.*
Disc magnet self-adhesive Ø 10 mm, height 1 mm, holds approx. 540 g -

20 pcs. 0,41 EUR ea.*
Disc magnet self-adhesive Ø 13 mm, height 1 mm, holds approx. 710 g -

20 pcs. 0,52 EUR ea.*
Disc magnet self-adhesive Ø 12 mm, height 2 mm, holds approx. 1,3 kg -

20 pcs. 0,46 EUR ea.*
Disc magnet self-adhesive Ø 15 mm, height 1 mm, holds approx. 820 g -

20 pcs. 0,38 EUR ea.*
Block magnet self-adhesive 10 x 10 x 1 mm, holds approx. 500 g -

20 pcs. 0,37 EUR ea.*
Block magnet self-adhesive 15 x 8 x 1 mm, holds approx. 600 g
Disclaimer: This customer project was sent to us in 2008 by R.E. from Laupen, Switzerland. This fantastic application has now been updated by the supermagnete team, and new photos were added too. Thank you for the great magnet project!
In our handicraft guide, you will find many more useful tips and tricks for making your own magnets.
Go to handicraft guide
The entire content of this site is protected by copyright.
Copying the content or using it elsewhere is not permitted without explicit approval.
Copying the content or using it elsewhere is not permitted without explicit approval.


